How to Use Blueprints in Planet Zoo 2: Browser, Placement and Editing
Learn how to use blueprints planet zoo 2: find pre-made and Workshop designs in the Browser, place them accurately, and adapt them with Group Edit Mode.
Quick answer: To use blueprints in Planet Zoo 2, open the Browser from the build menus, pick a pre-made Frontier blueprint or a community creation from the integrated Frontier Workshop, and place it on flat ground with a clear ghost preview. After placement you can move, rotate and adjust it, and Group Edit Mode lets you change individual scenery pieces inside the blueprint before saving your edits. Our blueprints guide explains the concept in depth; this page is the hands-on workflow.
Where Do You Find Blueprints in Planet Zoo 2?
Every blueprint lives in the Browser, the same in-game menu you use to pick scenery and facilities. Frontier has confirmed two sources. First, an extensive selection of pre-fabricated blueprints created by the development team, covering habitats, shops, guest facilities and scenery arrangements across the game’s themes. Second, the Frontier Workshop, which is fully integrated into the sequel — thousands of community creations are browsable directly inside the game, with no external window or website required.
That integration matters more than it sounds. In the original Planet Zoo, Workshop browsing pulled you out of the game; here you can filter, preview and place without breaking your building flow. Treat the Browser as your supply catalogue: official blueprints for reliable function, Workshop entries for inspiration and variety. For the bigger picture of what blueprints are and how they compare to free building, read our blueprints guide before you start clicking.
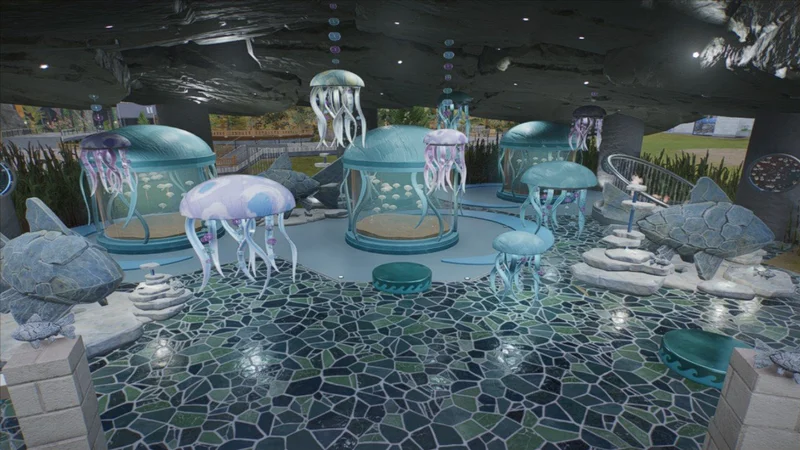
How Do You Place a Blueprint?
Placing a blueprint is a two-step mental process: choose the design, then choose the ground.
Once you select a blueprint from the Browser, the game shows a preview of the whole design following your cursor. Move it across your zoo and watch how the footprint interacts with the terrain. Blueprints behave best on ground you have already levelled, so spend a minute with the terrain tools first if the site is sloped — a design built for flat ground will fight a hillside, and the fight always costs you money later. Check three things before you confirm: the entrance or guest-facing side points toward your path network, staff doors sit within reach of staff paths, and nothing important is buried inside the footprint.
After the placement preview, confirm and the blueprint constructs as one unit. If the position is wrong, do not demolish and rebuy — select the placed blueprint and use the standard placement tools. Frontier has confirmed Move, Advance Move, Rotate and Scale tools for scenery, and placed blueprints respond to the same manipulation as other grouped objects. Exact modifier keys and grid-snap shortcuts vary by platform, and specific figures are still under community testing, so check the in-game controls guide for your setup.
How Do You Move, Rotate and Scale a Blueprint?
Rotation is the adjustment you will use most. A habitat blueprint dropped with its viewing window facing a staff corridor wastes its best side; rotate until the guest-facing elevation lines up with your main avenue. Scaling sits one level deeper: the sequel’s confirmed scaling system resizes scenery pieces, which means you can adjust what is inside a blueprint’s footprint even when the footprint itself stays fixed. Stretch a fence run to close a gap exactly, or enlarge a centrepiece piece so the composition reads correctly from your paths. Whether entire multi-piece blueprints scale as a single unit is the kind of detail specific figures are still under community testing, so experiment in Sandbox before relying on it in a Franchise budget.
One practical habit: place the blueprint roughly, rotate it to its final orientation, and only then fine-tune with Move. Repeated nudging before rotation doubles your work because every rotation pivots the group around its centre.
How Do You Edit a Blueprint You Have Placed?
This is where Planet Zoo 2 blueprints stop being vending machines. The official player guide confirms a Group Edit Mode workflow:
- Select the blueprint you want to edit.
- Choose the Enter Group Edit Mode option.
- Select individual scenery pieces to move or change them, or add new scenery grabbed from the Browser.
- Exit edit mode, and your edits to this individual blueprint are saved.
Read that fourth step twice. Your edits apply to this individual placement, not to the original blueprint — you are customising your copy in your zoo, not overwriting the shared design. That makes blueprints a legitimate starting point rather than a finished object. Swap the theme-inappropriate props, repaint pieces with the expanded flexi-colour options, or extend a shop with an extra counter, and the result stops looking like a download and starts looking like your zoo.
How Do Blueprints and Piece-by-Piece Building Work Together?
The strongest zoo designs mix both methods, and the handoff between them is a skill in itself. A proven veteran workflow: place a blueprint as the structural skeleton — a habitat layout you trust — then rebuild its edges piece by piece so the enclosure merges with your sculpted terrain and themed planting. The blueprint guarantees function; the custom edges deliver identity. Our scenery themes guide covers the architectural palettes that make those edges coherent, and the beginner guide walks through a first zoo from empty map to open gates.
Used this way, blueprints are scaffolding: they let you open fast, earn fast, and replace gradually. Master the Browser, the placement checks and Group Edit Mode, and you will never choose between speed and style again.
Related Articles
building
Planet Zoo 2 Flexi-Colour Guide: Recolouring Scenery and Paths
Planet zoo 2 flexi colour lets you repaint scenery and paths to match your theme. Learn which pieces support it, how to build a palette, and mistakes to avoid.
building
Planet Zoo 2 Piece-by-Piece Building Guide: Total Control
A planet zoo 2 piece by piece building guide covering the component library, grid snapping, alignment, mirroring, scaling, and the real performance cost of control.
building
Planet Zoo 2 Terrain Editing: Sculpt, Water and Path Tools Guide
Planet Zoo 2 terrain editing guide: sculpt and paint tools, adding and customising water, filtration networks, and every path building tool explained.
Was this helpful?
Thanks for the feedback!