Planet Zoo 2 Terrain Editing: Sculpt, Water and Path Tools Guide
Planet Zoo 2 terrain editing guide: sculpt and paint tools, adding and customising water, filtration networks, and every path building tool explained.
Quick answer: Terrain editing in Planet Zoo 2 follows a fixed order: flatten the footprint first, sculpt hills and valleys second, paint ground types third, and add water last — into depressions you dug yourself, never against paths. The same toolset builds land habitats, hippo pools and aquariums, while four path builders (Line, Curve, Draw and Stamp) carry guests and staff around everything you sculpt.
What do the terrain sculpting tools do?
The official environment tools work as one family, accessed from the Terrain menu. The Sculpt Tool pushes, pulls, sharpens and smooths the landscape with adjustable intensity and size. The Stamp Tool drops new land in one click, either as primitive shapes — cubes, spheres — or as preset landscape stamps for instant rock formations and hills. Together they let you dig caves and tunnels straight through terrain, which matters as much in a Wildlife Reserve restoration project as in a zoo habitat.
Two settings decide whether sculpting feels precise or chaotic: Intensity and Size. High intensity with a large radius is for reserve-scale landforms; low intensity and a small radius are for bank edges and the gentle slopes animals need to walk into water. Every tool shows a live highlight of what will change before you commit, and a generous undo history means a bad stamp costs one keystroke, not an afternoon.
Which ground types can you paint?
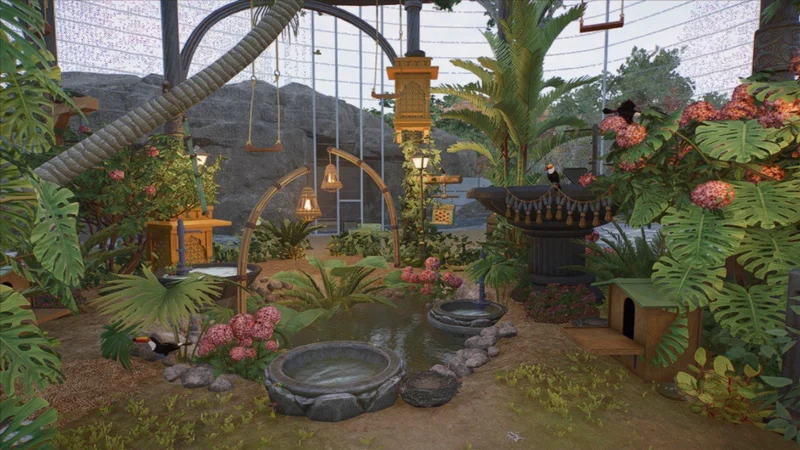
The Paint Tool covers Grass, Soil, Sand, Rock, Snow and Waterlogged, with intensity, size and sharpness sliders. Painted surfaces are welfare infrastructure, not decoration: the Zoopedia’s terrain bands for each species are percentages of exactly these ground types. Snow obeys physics — it only sticks where the ground is cold enough, so a Cooler keeps it frozen in a hot biome.
Waterlogged ground deserves special attention because it cuts both ways. Several species list it in their official tolerances — the common hippopotamus wants 20–60% waterlogged ground, the Komodo dragon tolerates up to 10%, and the plains zebra accepts 0–10% — while others reject it entirely: the snow leopard’s band discourages it completely. The catch is that waterlogged ground also appears as a side effect of editing terrain near standing water, and animals that dislike it will lose welfare from a swamp you never intended. Paint deliberately, check the species’ band before you pour, and match the terrain recipe to the animal rather than to the screenshot. The full ground-type philosophy lives in our habitat design guide.
How do you add and manage water?
Water only ever goes where terrain allows it: dig the depression with the terrain tools, then use the Add Water tool on the dip. A highlight previews the water level before you confirm — check that level against every nearby path tile, because water respects elevated paths but floods low ones. You can expand and shrink bodies of water afterwards, and sculpt underwater with the same terrain tools you use on land.
Once placed, a body of water is customisable from its Info Panel: surface choppiness, presets for quick visual styles, and individual settings like fogging and dust motes. For habitat water that animals drink from, the clean supply comes from a Filtration Network — Water Filters clean connected water, Water Pumps extend that cleaning to natural bodies of water within their radius and can also control water temperature. Salinity runs through the same network: only freshwater counts as drinking water for terrestrial animals, while aquarium species have their own salinity requirements covered in the aquatic animals guide.
Which path tool should you use?
Four builders cover every situation. The Line Builder plots straight runs with precise length, width and angle snaps. The Curve Builder bends naturally around habitats. The Draw Tool freehands custom shapes and plazas — connect back to your starting point to close the shape. The Stamp Builder drops geometric sections that snap together or to the building grid, which is the fastest way to raise a plaza in front of a viewing window. Editing tools keep finished paths tidy: the Path Painter restyles surfaces, railings, kerbs and supports in place, the Corner Radius Editor rounds sharp joins, and Edit Widgets adjust height and radius of an existing border. Curved Elevation toggles let paths climb as smooth slopes and stairs rather than kinked segments.
Width is a flow decision, not a cosmetic one. Main arteries past busy viewing areas need generous width or guests bottleneck; staff paths separate keepers from crowds and cut walking time to feeders and gates. For the guest-side logic of sightlines and plazas, our blueprints guide shows how prefab layouts already solve these problems.
What is the correct build order for terrain, water and paths?
The workflow that avoids rework, confirmed across Frontier’s official guides:
- Flatten the habitat and plaza footprints first. Level ground makes barrier placement, pathing and keeper access exponentially easier.
- Sculpt and stamp the landscape — hills, banks, caves, the pool basin.
- Paint ground types to the species’ Zoopedia bands.
- Add water into the basins, setting the level below your lowest path.
- Build barriers and gates — remember only watertight barrier types can hold a water body, so the pool edge is a barrier decision.
- Path the guest and staff networks, then scenery last.
Deviating from the order is how zoos end up with flooded paths and habitat floors that keepers cannot cross. If you hit terrain or water behaving strangely — surfaces that will not paint, water levels that ignore the preview, ground going waterlogged against your will — check the known issues and fixes page before demolishing anything, since confirmed bugs and their workarounds are tracked there.
Related Articles
building
Planet Zoo 2 Flexi-Colour Guide: Recolouring Scenery and Paths
Planet zoo 2 flexi colour lets you repaint scenery and paths to match your theme. Learn which pieces support it, how to build a palette, and mistakes to avoid.
building
How to Use Blueprints in Planet Zoo 2: Browser, Placement and Editing
Learn how to use blueprints planet zoo 2: find pre-made and Workshop designs in the Browser, place them accurately, and adapt them with Group Edit Mode.
building
Planet Zoo 2 Piece-by-Piece Building Guide: Total Control
A planet zoo 2 piece by piece building guide covering the component library, grid snapping, alignment, mirroring, scaling, and the real performance cost of control.
Was this helpful?
Thanks for the feedback!