Planet Zoo 2 Piece-by-Piece Building Guide: Total Control
A planet zoo 2 piece by piece building guide covering the component library, grid snapping, alignment, mirroring, scaling, and the real performance cost of control.
Quick answer: Piece-by-piece building in Planet Zoo 2 is the franchise’s full-control construction method: every wall, fence, path segment and prop is placed by hand from the Browser’s component library, assisted by grid snapping, surface alignment, scaling and mirroring. It is slower than placing blueprints, but only it can produce a structure that fits awkward terrain exactly and carries your personal style — the trade-off is real construction time and a higher per-piece performance cost.
What Is Piece-by-Piece Building in Planet Zoo 2?
Piece-by-piece construction is the opposite of dropping a ready-made blueprint. Instead of receiving a finished building, you assemble it from individual components — wall pieces, roofs, doors, path segments, plants, lamps, benches — each one selected from the Browser and placed, rotated and adjusted by hand. Frontier has confirmed the method returns in full for the sequel, alongside a related option that expands what counts as a building: open-plan structures with no front wall, which let guests flow through spaces that blur the line between facility and scenery.
The confirmed placement toolkit sets the ceiling. Every scenery piece can be manipulated with Move, Advance Move, Rotate and Scale tools, scenery can be scaled and mirrored, and Frontier has reworked the under-the-bonnet fundamentals — selecting pieces, creating groups, and snapping or aligning to surfaces are all easier than they were in the original. The result keeps the high ceiling veteran builders expect: if you can imagine a structure, you can probably assemble it. If you would rather trade that control for speed, our blueprints guide covers the ready-made route.
How Does the Building Grid Speed Up Construction?
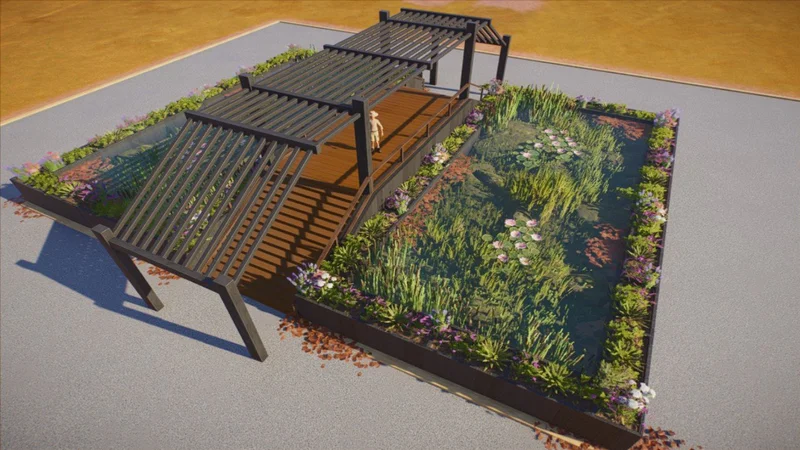
The grid is what makes piece-by-piece building tolerable at scale. Confirmed grid mechanics from the official player guide: grid pieces automatically connect to the building grid, grid-capable items are flagged with a Grid Prop icon in the Browser, and the settings panel for building pieces lets you change the grid size and grid height you are working on.
Work the grid in the right order and entire walls assemble in clicks rather than nudges. Set your grid size to match the module of your design — most themed wall sets are built around consistent module lengths — set grid height to the storey you are on, and place pieces so their auto-connection does the alignment for you. When you switch to freeform decoration, such as placing a statue off-grid, the Move and Advance Move tools take over where the grid stops.
Two habits separate fast builders from frustrated ones. First, plan the footprint on paths before the walls: guests and staff only care about reachable doors, so lay the path spine, then grow the building around it. Second, toggle Advanced Mode on when building habitats and laying paths — it unlocks additional tool options confirmed by Frontier, and the extra controls save real time once you learn them. For how those paths feed habitat viewing areas, see our habitat design guide.
How Do Snapping, Alignment and Mirroring Work?
Snapping is the quiet engine of clean custom builds. Confirmed for the sequel: scenery snaps and aligns to surfaces, and the selection and grouping tools have been reworked so you can grab pieces, form groups and align them with far less fighting than the original game demanded. Grid pieces snap to the building grid automatically; off-grid pieces align to terrain and other surfaces.
Mirroring is the other confirmed time-saver, and it exists to serve symmetry. Plazas, gatehouses and habitat shelters all benefit from balanced compositions, and mirroring a piece — a column run, a roof trim, a decorative arch — halves the placement work while keeping the design mathematically symmetrical. Pair it with scaling and a single prop becomes a design system: one arch, mirrored and resized three ways, builds an entire colonnade. The exact duplication and copy-paste shortcuts differ by platform, and specific figures are still under community testing, so confirm your keybinds in the controls guide.
Once an arrangement works, group it. Groups turn ten careful placements into one movable object, which is how custom builders reuse their own work the way blueprint users reuse downloads — and how you can save your own creations toward the Workshop.
What Is the Performance Cost of Piece-by-Piece?
Control has a price, and it is paid per piece. A blueprint enters your zoo as a managed group; a piece-by-piece structure is a collection of individual objects the engine must track, render and light. Hundreds of separately placed props in one plaza will cost more than a single grouped prefab of similar visual weight. The practical consequences — at what piece count frame rates dip on which hardware, and how grouping mitigates it — are specific figures still under community testing, and the community is actively measuring them since launch.
Three confirmed tools keep the cost under control. Nature brushes paint foliage and rocks in strokes instead of individual placements, with configurable intensity and path interaction — use them for planting density and save hand-placed plants for hero spots. Groups consolidate management of finished arrangements. And scaling lets one asset do the visual work of three sizes, reducing the variety of pieces a scene needs. Build dense where guests linger longest, and economise where they pass through.
When Should You Choose Piece-by-Piece Over Blueprints?
Choose piece-by-piece when identity and fit outrank speed: the entrance plaza that sets your zoo’s tone, signature habitats for flagship animals, and anywhere the terrain is awkward enough that a generic footprint would fight it. Sandbox mode is where the method shines brightest, since unlimited funds remove the economic penalty for slow construction. Our beginner guide sequences these choices across a first full zoo.
Choose blueprints when volume and reliability matter more: opening hours in Franchise mode, functional back-of-house buildings, and any structure guests never scrutinise. The veteran move is the hybrid — blueprint skeleton, custom edges, and flexi-colour to stitch the two into one vision. For the hands-on placement and editing workflow, our how-to-use-blueprints guide walks the blueprint side step by step.
Related Articles
building
Planet Zoo 2 Flexi-Colour Guide: Recolouring Scenery and Paths
Planet zoo 2 flexi colour lets you repaint scenery and paths to match your theme. Learn which pieces support it, how to build a palette, and mistakes to avoid.
building
How to Use Blueprints in Planet Zoo 2: Browser, Placement and Editing
Learn how to use blueprints planet zoo 2: find pre-made and Workshop designs in the Browser, place them accurately, and adapt them with Group Edit Mode.
building
Planet Zoo 2 Terrain Editing: Sculpt, Water and Path Tools Guide
Planet Zoo 2 terrain editing guide: sculpt and paint tools, adding and customising water, filtration networks, and every path building tool explained.
Was this helpful?
Thanks for the feedback!